Showing posts with label Furniture Restoration. Show all posts

Sunday, July 14, 2013

Cabinet Update

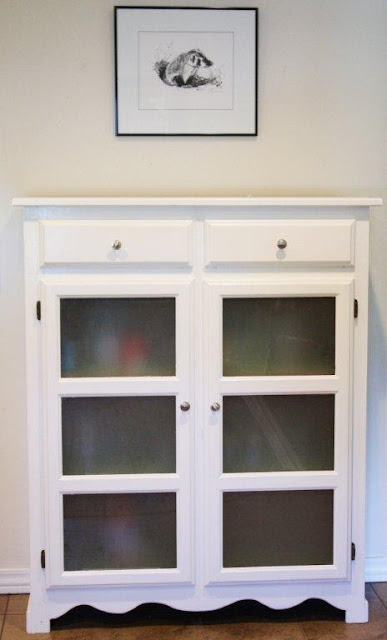
It's been a long time since I've worked on a furniture project.  This cabinet update was a simple project compared to some refinishing work that I've done.  I forgot to take a photo of the before but had this old one from years ago that shows where I started from.

 
Cute dog - Ugly cabinet


I sanded the wood down, replaced the fake copper with glass and added new hardware.  It gives the room a fresher and cleaner look.  More painting is needed in a few more rooms and I've been leaning towards whites or lighter colors than in the past.  Also I've been gradually getting rid of "stuff" around the house and going with a more minimalist look.  Who needs all that junk anyway?
 

Saturday, March 24, 2012

One of a Kind Chair for a One of Kind Guy

I've done all kinds of furniture refinishing over the years but their's been one person in my family that hasn't received anything from me- till now.  If you know Alex, you'll agree that he's a special kind of guy and it is only fitting that I find a unique piece of furniture to give him.

Last fall while making a purchase at Paul's Upholstery in downtown Bloomington, I spotted a fantastic men's office chair in their window - an old wooden office chair covered in cowhide leather.  It had a totally masculine feel to it and I knew then that I wanted to somehow recreate something similiar for Alex especially since he's always liked the feel of cow hide on his back side.


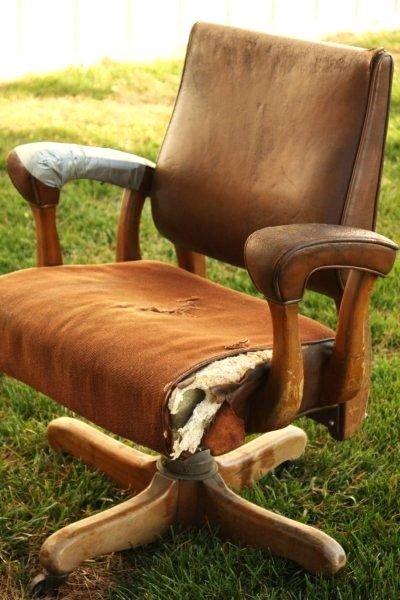
It wasn't one month later while rummaging around the back of the Old House Society, I came across that perfect chair - great working condition, but pretty worn out.  After inquirying about it they told me it was to be thrown out!  Woohoo - I grabbed it before they could change their minds.

This chair was made by the Milwaukee Chair Company who made all the chairs for the US House & Senate until 1940.  Their chairs were made to last and this one weighs a ton.  Although the outside fabric and padding were totally worn out, all the workings of the chair were in perfect order. 


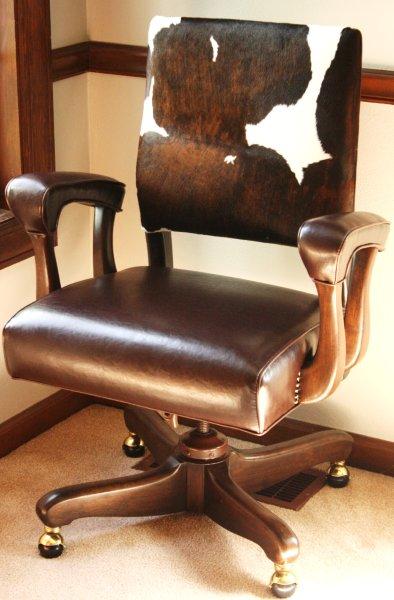
I took the chair down to it's bones replacing the castors, sanding and staining the wood which appears to be black walnut.  I would not attempt to do the upholstery - that I left to Paul Sr at Paul's Upholstery.   He recommended that I look at Tandy Leather in Peoria for a cow hide.  I picked out a brown brindle hair-on-hide calf skin that had some random white patches and even a couple scars. 


I couldn't have been happier with the work that Paul Sr. did on this chair .He was true to the original features of the old chair, but the new leather and cow hide give it the wow factor.

Hope you like it Alex - can't wait to see you kicking back in it - cowboy boots and all.

Friday, February 24, 2012

Nailhead Chair

I've always wanted to try my hand at decorating something with nailheads.  There are tutorials everywhere on the net and countless examples of different projects to use them on.  Having never done any of this before I needed a fairly easy piece as my initial introduction in nailhead trim.  I came across this chair at our church's garage sale for $5.00 and decided that it could really use some pop.


  I originally wanted to refinish and stain the wood, but I changed my mind halfway through the project and went with white paint instead.  I found a nice yellow geometric print fabric that along with the white paint totally transformed the chair.

 You can tack on individual nails or buy nailhead strips as I did, where only a few nails are tacked in along the strip. The strip made the job fairly easy, but take my advice and buy a tack hammer to use in nailing down the tacks.  Using a hammer (or meat mallet as one site advised) leads to bent nails and an unsatisfactory job.


I'm not that happy with the outcome of this chair because of the uneveness of tacking and the geometric print is "off" in places, but I'll take it as a first try.  I'd like to try the individual nailheads next time and with proper tools and a little experience the outcome should be better.

Wednesday, January 25, 2012

Mini Chandelier

Chandeliers are all the rage right now and people are putting them in any room from kitchens to bathrooms.  Although we don't have a room suitable for one, it hasn't stopped me from wanting to put one up.  So when I first spotted this "spiderman" light fixture I thought wow that's alot of glass, then wow that's super ugly.  But if you look beyond the glass and the ugly you will see a little chandelier begging to be set free.


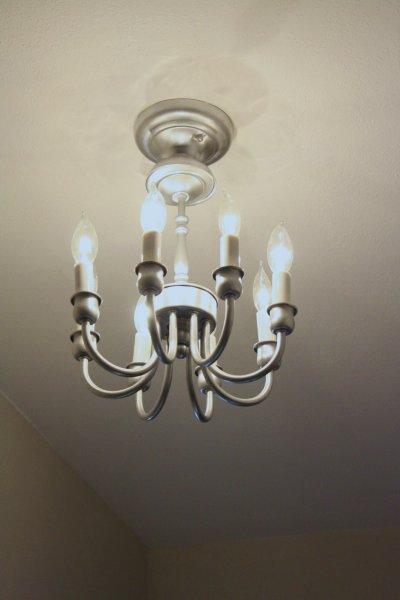
I took the whole contraption apart and discarded the entire outer portion of glass.  I used a couple pieces of the base and bolted them together.  All that was needed to complete the transformation was a spray painted nickel finish.  It took some doing to get the light hung because we had to drill new fastener holes and purchase new rod fasteners and screw caps. 


We exchanged our old, dim light in our hallway for the chandelier and the change is dramatic.  Here's a breakdown of the costs:

Thrift store light                                $3.50
Spray paint (already had)                     .00
Fasteners & caps                               5.76
Labor to hang light (husband)        priceless

                                       Total        $9.26


Saturday, December 3, 2011

Side Table

I found this small side table at a local antique shop for only $10.00.  I wasn't sure where or what I was going to do with this but I knew a coat of paint would do it wonders. 


I sanded it lightly, primed then gave it a couple coats of a dove gray paint.  It looked really good but the small carvings on the front needed some contrast to stand out.  I had never glazed before, but decided to give it a try.  I mixed in a couple teaspoons of brown paint with a 1/2 cup of glaze and brushed on a light coat over the entire piece.  I then wiped most of it off with the exception of the carvings and some edges.  I wanted a very subtle look to the glazing and that's what I got.


This gray color would look great on anything and it seems to go with everything I have.  I plan on using it for several more pieces.


Monday, November 21, 2011

Desk Chair

To go along with my newly painted desk I needed a small desk chair.  This one came from my parents home, but was in dire need of an update.  The seat was old vinyl and although the wood was in great shape it needed to be stripped and resealed.


Found beautiful vintage style material at thrift store for seat.

After stripping the old finish off, I decided to leave the wood natural and just used a clear poly to seal.  Old nicks and marks give the chair a rustic feel.
The light natural finish is a great accent to the lime green desk.
The free form cutout on the back of chair is my favorite part.

Saturday, November 12, 2011

Little Vintage Table

I found this little side table at an estate tag sale for $6.  It was in pretty bad shape with a broken leg and beat up finish but it held a certain charm and I couldn't pass it up.  Also it's the type of table that could be used anywhere in the home from bedroom as a nightstand to the living room as a side table.


Since this table was going to Kate's new house, I let her pick the finish.  She decided on Sky Blue from Eddie Bauer, a soft pretty blue which gave it a fresh new look.


The interesting thing about this table is that it has removable "toes".  The toes are little decorative metal caps that slide onto the tips of the feet apparently to protect from damage.  They  remind me of the decorative bows that you can add to dress pumps to change the look.  The table looks great without them, but for a more vintage look they could be slipped on.


Saturday, October 29, 2011

The Pumpkin Chair


There wasn't anything wrong with the color of this quirky little chair besides it just being boring.  I wanted to go in the opposite direction and do something bright and boy did I ever.  This color reminds me of the orange on the highway traffic pylons.  It's not quite what I had in mind but hey, it's only paint.  I call it my pumpkin chair and would look cute outside on Halloween with a bale of hay and some gourds.  For now it's an extra side chair in the upstairs guest room. 


Saturday, October 22, 2011

Painted Writing Desk

I've been looking for some time for a small desk to help me keep better organized.  I've got files, notes and receipts scattered in several places and wanted a central place to bring everything together.  I found this desk at a neighbor's estate sale for $50 and nabbed it right away.  It had a loose leg, chipped veneer and a missing knob, but I could see alot of potential.


The decorative piece under the front was so badly chipped that it had to go.  I knocked that out easily with a hammer.  I glued the leg back in place, used alot of wood filler and went to town on the sanding.  When it was sanded smooth, I applied two thin coats of a white primer.  You can start to see the nice detailing on the drawers.


Initially I wanted to go with white for this but decided we needed more color in our home.  I picked out a bright green and applied two coats.  I love the color against the old hardware and it has changed the whole look of our living room.  Now I'm looking for a nice chair to pair this with.  Stay tuned for the next project.


Sunday, October 16, 2011

Funky Cabinet

I found this funky cabinet at the local thrift shop and got the go ahead from Kate to purchase and redo it for her.  This looked like an easy redo - a little sanding, some paint, and it would be good to go.  But that was not to be. I've done major refinishing projects with less problems than this little cabinet.  From panels sticking and not sliding to the knobs not fitting and paint not adhering properly, this has been a real pain and totally not worth the trouble.


Innocent little cabinet.  Not.


Monday, September 19, 2011

The Chevron Chair

Awhile back I was walking in Kate's neighborhood and stumbled across a yard sale where I picked up this curvy chair for $5.00.  We knew immediately that it would look great in her new/old house and I took it home and started sanding and painting.


 She emailed me a picture of a cool chevron fabric that would look great on it and I happened to walk into Hancock Fabrics and found the exact thing.  A coat of primer, two coats of a soft white paint and a new padded seat and the chair looks like new.  This one of a kind chair that can be used for extra seating in her den, as a desk chair or as a handy chair for putting on shoes in her entryway.


Monday, September 5, 2011

The Stylaire Stepstool


Manufactured during the 50's the Stylaire stepstool came in at least two colors, yellow and this red called banner red.  We inherited this stool from John's dad and unfortunately did not treat it with much respect.  This summer I spotted it standing over in a corner of the shed looking pretty neglected and decided to surprise John by secretly restoring it.  I had to dodge him several times while I was scraping, polishing and painting in his shop but managed to surprise him in the end.  We were both real happy with the outcome and have proudly given the family heirloom a place in the house.